How to clean a chiller's condenser coils?
Leave a message

A chiller is a vital component in many commercial and industrial cooling systems, and the condenser coils play a crucial role in its efficient operation. Over time, these coils can accumulate dirt, dust, debris, and other contaminants, which can significantly reduce the chiller's performance and energy efficiency. As a professional chiller provider, I'm here to share with you a comprehensive guide on how to clean a chiller's condenser coils effectively.
Understanding the Importance of Cleaning Condenser Coils
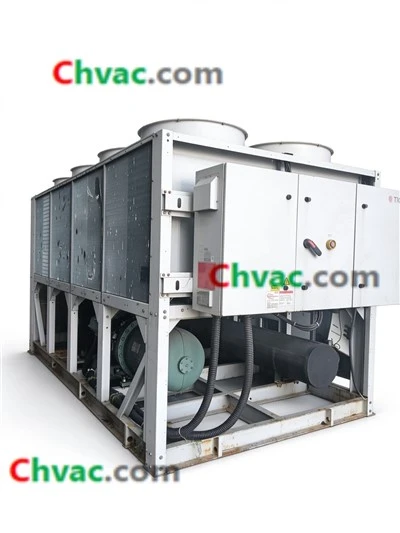
Before delving into the cleaning process, it's essential to understand why cleaning condenser coils is so important. The condenser coils are responsible for releasing heat from the refrigerant to the surrounding environment. When the coils are dirty, the heat transfer process is impeded, causing the chiller to work harder to achieve the desired cooling effect. This not only increases energy consumption but also puts additional stress on the chiller's components, leading to potential breakdowns and costly repairs.


Regularly cleaning the condenser coils can help maintain the chiller's efficiency, reduce energy costs, extend the equipment's lifespan, and ensure consistent cooling performance. It's a simple yet effective maintenance task that can have a significant impact on the overall operation of your cooling system.
Preparing for the Cleaning Process
Before you start cleaning the condenser coils, there are several important steps to take to ensure your safety and the effectiveness of the cleaning process:
- Safety First: Always follow safety procedures when working with a chiller. Turn off the power supply to the chiller to prevent any electrical hazards. Wear appropriate personal protective equipment (PPE), such as gloves, safety glasses, and a dust mask, to protect yourself from dirt, debris, and cleaning chemicals.
- Gather the Necessary Tools and Supplies: You will need a variety of tools and supplies to clean the condenser coils effectively. Some of the essential items include a soft-bristled brush, a coil cleaner solution, a pressure washer (if recommended by the manufacturer), a garden hose, and a vacuum cleaner.
- Inspect the Coils: Before cleaning, carefully inspect the condenser coils for any signs of damage, such as bent or crushed fins. If you notice any damage, it's important to address it before proceeding with the cleaning process. Bent fins can be straightened using a fin comb, which is a specialized tool designed for this purpose.
- Refer to the Manufacturer's Instructions: Different chillers may have different cleaning requirements and recommendations. Always refer to the manufacturer's instructions and guidelines for cleaning the condenser coils. This will ensure that you use the appropriate cleaning methods and products and avoid causing any damage to the equipment.
Cleaning the Condenser Coils
Once you have completed the necessary preparations, you can start cleaning the condenser coils. Here is a step-by-step guide on how to clean the condenser coils effectively:
- Remove Loose Debris: Use a soft-bristled brush or a vacuum cleaner to remove any loose dirt, dust, leaves, or other debris from the surface of the condenser coils. Start from the top of the coils and work your way down, being careful not to damage the fins. Pay special attention to the areas around the fan and the condenser housing, as these are often the areas where debris accumulates the most.
- Apply the Coil Cleaner Solution: Mix the coil cleaner solution according to the manufacturer's instructions. Apply the solution to the condenser coils using a spray bottle or a garden hose with a spray nozzle. Make sure to cover the entire surface of the coils evenly. Allow the solution to sit on the coils for the recommended amount of time to allow it to break down the dirt and grime.
- Rinse the Coils: After the coil cleaner solution has had time to work, use a garden hose or a pressure washer (if recommended by the manufacturer) to rinse the condenser coils thoroughly. Start from the top of the coils and work your way down, using a gentle stream of water to avoid damaging the fins. Make sure to remove all of the cleaning solution and debris from the coils.
- Repeat the Cleaning Process (if necessary): If the coils are still dirty after the first cleaning, you may need to repeat the process. You can also try using a stronger coil cleaner solution or a longer soaking time to remove stubborn dirt and grime.
- Dry the Coils: Once the coils are clean, use a soft cloth or a fan to dry them completely. This will help prevent the growth of mold and mildew on the coils.
Tips for Maintaining Clean Condenser Coils
In addition to regular cleaning, there are several other steps you can take to maintain clean condenser coils and ensure the optimal performance of your chiller:
- Keep the Area Around the Chiller Clean: Make sure to keep the area around the chiller free of debris, such as leaves, grass, and dirt. This will help prevent debris from accumulating on the condenser coils and reducing their efficiency.
- Install Air Filters: Install high-quality air filters in the chiller's intake vents to prevent dirt, dust, and other contaminants from entering the system. Replace the air filters regularly according to the manufacturer's recommendations.
- Schedule Regular Maintenance: Schedule regular maintenance for your chiller, including professional inspections and tune-ups. A qualified technician can check the condenser coils for signs of damage or wear and perform any necessary cleaning or repairs.
- Monitor the Chiller's Performance: Keep an eye on the chiller's performance, including its energy consumption, cooling capacity, and temperature. If you notice any significant changes in the chiller's performance, it may be a sign that the condenser coils need cleaning or that there is a more serious problem with the system.
Conclusion
Cleaning a chiller's condenser coils is an important maintenance task that can help improve the efficiency, reliability, and lifespan of your cooling system. By following the steps outlined in this guide and implementing the tips for maintaining clean condenser coils, you can ensure that your chiller operates at its best and provides consistent cooling performance for years to come.
At our company, we are committed to providing high-quality chillers and reliable after-sales service. We offer a wide range of chillers, including the Trane RTHB180 Water Cooled Chiller, Carrier 30HXC165A Water Cooled Chiller, and 800 TR Carrier Centrifugal 19XRV6666467DJS52 Water Cooled Chiller. If you are in the market for a new chiller or need assistance with chiller maintenance and repair, please don't hesitate to contact us. We'd be happy to discuss your specific requirements and help you find the best solution for your needs.
References
- ASHRAE Handbook - HVAC Systems and Equipment.
- Manufacturer's instructions for specific chiller models.
- Industry best practices for chiller maintenance and cleaning.