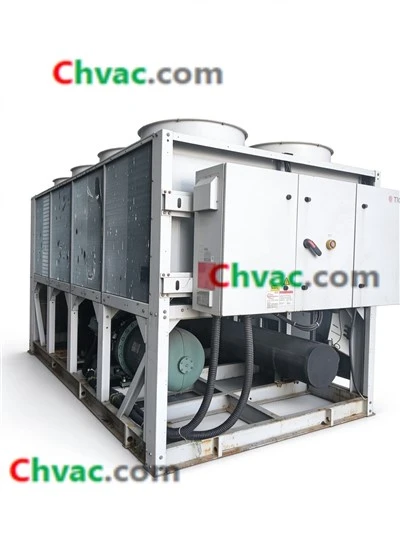
How to install a York Screw Chiller?
Leave a message

Hey there! As a supplier of York Screw Chillers, I've had my fair share of experiences with these amazing machines. Installing a York Screw Chiller might seem like a daunting task, but with the right know - how, it can be a smooth process. In this blog, I'll walk you through the steps to install a York Screw Chiller.
Pre - installation Preparations
First things first, you gotta do some prep work. Before you even think about unpacking that chiller, make sure you've got a suitable location. The area should be well - ventilated to prevent overheating. You don't want the chiller to get all toasty and stop working efficiently. It also needs to be on a flat and stable surface. A wobbly foundation can cause all sorts of problems down the line, like vibrations and uneven wear.
Check the electrical supply. York Screw Chillers need a proper power source. You'll have to make sure the voltage and amperage match what the chiller requires. If you're not sure about this, it's a good idea to call in an electrician. They'll be able to hook it up right and keep you safe from any electrical hazards.


Also, take a look at the water supply. These chillers rely on water for cooling. You need to have a clean and reliable water source. The water quality is crucial. If the water is full of dirt and debris, it can clog up the chiller's components and reduce its lifespan.
Unpacking and Inspection
Once you've got the perfect spot and all the utilities sorted, it's time to unpack the chiller. Be careful when you're doing this. The chiller is a big and heavy piece of equipment, and you don't want to damage it. Check for any visible signs of damage during shipping. Look for dents, scratches, or loose parts. If you find anything wrong, contact the shipping company and us right away.
Inspect all the components that came with the chiller. Make sure you have everything listed in the manual. You don't want to start the installation only to realize you're missing a crucial part.
Installation Steps
Mounting the Chiller
The first step in the actual installation is mounting the chiller. Use the appropriate lifting equipment to move it into place. Once it's on the foundation, secure it properly. You can use bolts or other fasteners as recommended in the installation manual. This will keep the chiller stable during operation.
Connecting the Piping
Next up is connecting the piping. You'll have to connect the water inlet and outlet pipes. Make sure the connections are tight to prevent any leaks. Use the right type of gaskets and seals. York provides detailed instructions on the correct piping configuration. You can refer to the manual to ensure you're doing it right.
Electrical Connections
Now, it's time for the electrical connections. This is a critical step, so if you're not an electrician, don't try to do it yourself. An electrician will connect the chiller to the power supply. They'll also wire up any controls and sensors. Make sure all the electrical connections are insulated properly to avoid short - circuits.
Refrigerant Charging
After the mechanical and electrical connections are done, it's time to charge the refrigerant. This is a job for a trained technician. They'll use the right equipment to measure and add the correct amount of refrigerant. Too much or too little refrigerant can affect the chiller's performance.
Testing and Commissioning
Once the installation is complete, you need to test the chiller. Start by checking all the connections again. Make sure everything is tight and secure. Then, power on the chiller and let it run for a while. Monitor the temperature, pressure, and other parameters. The chiller should start cooling the water as expected.
If you notice any issues during the testing phase, don't panic. Most problems can be fixed easily. You can refer to the troubleshooting section in the manual or give us a call. We're here to help you get your chiller up and running smoothly.
Different York Screw Chillers
We offer a variety of York Screw Chillers, each with its own features and capabilities. For example, the YorkYSDBCAS35CH/22 Chiller is a great option for smaller applications. It's compact and energy - efficient, making it perfect for places with limited space.
If you need something more powerful, the 550TR YORK YK CHILLER CHVAC 2025 NEW WATER COOLED CHILLER is a beast. It can handle large cooling loads, making it ideal for industrial and commercial buildings.
Another option is the York YGWS160CA50B Chiller. It offers a good balance between performance and cost - effectiveness.
Why Choose Our York Screw Chillers
Our York Screw Chillers are top - notch. They're built with high - quality materials and the latest technology. You can count on them to provide reliable and efficient cooling for years to come. We also offer excellent customer support. If you have any questions during the installation or operation of the chiller, our team is just a call away.
Contact Us for Purchase and Consultation
If you're interested in purchasing a York Screw Chiller or need more information about the installation process, don't hesitate to reach out. We're here to assist you every step of the way. Whether you're a small business owner or part of a large corporation, we've got the right chiller for you. So, get in touch with us today and let's start keeping your space cool!
References
- York Screw Chiller Installation Manual
- Manufacturer's Technical Documentation