How to install a chiller by myself?
Leave a message

Hey, if you're reading this, you're probably a business owner, a building maintenance guy, or just someone trying to save some cash by installing a chiller yourself instead of paying a team of HVAC techs an arm and a leg. I've been selling chillers for 8 years with our company (we're chiller suppliers, duh) - I've seen people mess up installs so bad they had to call me last-minute to fix their mistakes, and I've seen folks pull it off like pros, saving thousands in the process. Today, I'm walking you through how to do a DIY chiller install right, no fancy engineering degree required, just some common sense and patience.
First off, let's get one thing straight: this isn't swapping a window AC unit. Chilllers are big, heavy, and work hard to keep things cool (think restaurants, warehouses, gyms with big industrial fridges, even office buildings with tons of servers). Cut corners here, and you'll be dealing with leaks, weird temperature swings, or worse - a chiller that breaks down in the middle of a 90-degree heatwave when you need it most. But if you do it step by step, check every box, and pick the right chiller for your space, you can absolutely pull this off. I've helped a local auto shop owner install a used screw chiller last year that saved him $12k vs. a professional install - and it's still running like a champ.
Let's start with the most important step before you even touch the chiller: picking the right unit. This is make or break. If you get a chiller that's too small, it'll run nonstop and burn out fast; too big, and it'll cycle on and off all day, wasting energy. Here's the quick math: calculate your total cooling load. For most spaces, that's roughly 20-25 BTUs per square foot (for offices, retail) up to 30-40 BTUs for places with big heat sources (like kitchens with stoves, server rooms). If you're confused, just hit our site - we've got a load calculator tool, but I'll warn you, don't rely on random online calculators - they don't account for things like ceiling height, number of windows, or heat-generating equipment you have.
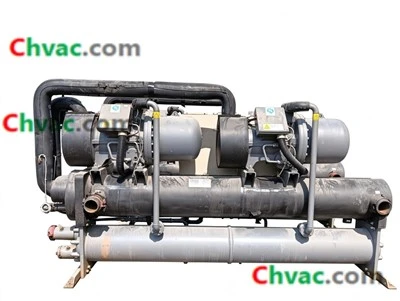
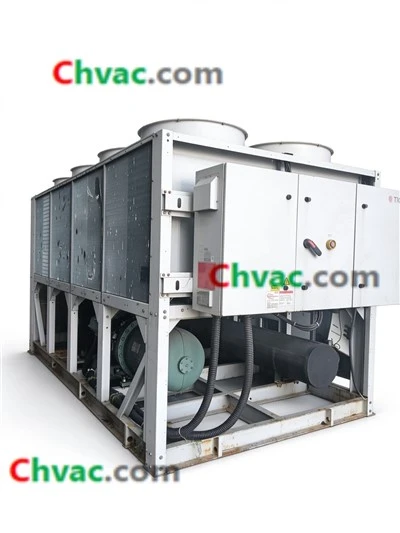
That said, here's what we've got in stock that's perfect for DIYers (or people planning DIY installs): if you're looking for a mid-range unit for a 2,000-3,000 sq ft space, our KUENLING AIR 100RT Water-cooled Screw Chiller KLSW-111D2(Used)in Stock is a solid pick - it's reliable, easy to work on, and comes with a full parts list so you don't have to guess what you need. For something a bit bigger, maybe a ground source heat pump that works even in extreme temps, check out our Hongli 256R SM(LM)-240 Ground Source Heat Pump Air Conditioning Unit(Used) in Stock - these are pre-tested, so you don't have to do extra diagnostics before installing. If you're going new and want a top-tier unit, our Carrier 750RT Centrifugal‑chiller 19XR6X65466LGH52 (New) in Stock is built to last, but note that's a big unit - best for 10,000+ sq ft spaces, so you'll need a little more space for it. We also have Haier 56RT Water-Cooled Screw Chiller HX56/A (New)in Stock, which is smaller and perfect for shops or small warehouses - great if you're new to this, since it's compact and has clear installation guides. And if you're on a budget for a used unit that's been inspected, our YORK 366.32RT RWK II 65E‑CMWBY225CQS Screw Compressor Unit (used) is a workhorse that's been checked by our techs, so you can trust it's not a lemon.
Once you've got your chiller, the next step is prepping the spot. You can't just plop this thing anywhere. First, it needs a level, solid surface - we're talking concrete pad that's at least 4 inches thick, no cracks, and big enough to fit the chiller plus 2-3 feet of space around it for maintenance. Chilllers vibrate when they run, so if the pad isn't level, you'll get leaks from the pipes or damage to the compressor over time. We always tell folks to rent a laser level for $20 at your local hardware store - it's worth it to avoid a wonky install. Also, make sure the spot is well-ventilated - water-cooled chillers need to exchange heat, so don't put it in a closed closet or a corner where air can't flow. If it's air-cooled, it's even more important, but all the units I mentioned (even the water-cooled ones) need good air flow. Another thing: clear access to electricity and water lines - you don't want to be dragging a 50-foot extension cord (don't use those, by the way) 50 feet once you're ready to hook up.
Next, getting the chiller onto the pad. This is where you need to be super careful - these things weigh hundreds of pounds. Don't try to move it by yourself. Rent a forklift or a hand truck with a helper, and use the lifting brackets that come with the chiller (never lift it by the pipes or the compressor - that's a quick way to break something expensive). Set it down gently, don't drop it even an inch. Once it's on the pad, use shims (rubber ones, not wood) to level it. Rubber shims will also absorb some vibration, which is better for the unit's longevity than metal or wood.
Now for the hard part: plumbing and electrical. This is where most DIYers mess up, so pay attention. First, plumbing: if you got a water-cooled chiller, you'll need two lines: a supply line that brings cold water to the chiller's evaporator, and a return line that takes the warm water back. You'll also need a drain line for the condenser - this is key, if you skip the drain, water will back up and cause leaks. Use PVC or copper pipes, whichever your local code allows, and make sure every connection is sealed with Teflon tape (for threaded joints) or soldered properly (for copper). Pro tip: mark the pipes before you cut them so they fit right - nothing worse than cutting a pipe too short and having to run to the store mid-install.
For electrical: this is non-negotiable - turn off the main power before doing anything. Chilllers run on high voltage, so if you're not comfortable with electrical work, hire an electrician. Seriously, don't risk getting shocked or burning down your space. But if you know your way around circuits, here's what to do: match the voltage on the chiller's nameplate to your building's electrical panel, use the correct size wire (the nameplate will tell you - don't use smaller wire, it'll overheat), and install a dedicated breaker. Also, make sure the chiller is grounded - that's for safety, no exceptions.
Once plumbing and electrical are hooked up, it's time for pressure testing. This is the most important step to avoid leaks after you fill the chiller with water. For plumbing, use a pressure gauge to pressurize the lines to 150 PSI (check your chiller's manual for exact PSI - some are lower). Wait 24 hours and see if the pressure drops. If it does, you've got a leak - go through every joint and check with soapy water (bubbles mean a leak). Fix any leaks before moving on. For the refrigerant side (inside the chiller, you don't touch that), our techs already do a pressure test before we ship it, so you don't have to worry about that with our units - that's one less headache for DIYers.
Now, filling the chiller. Follow the manual for the type of water to use - most chillers need deionized water or a mix of water and glycol, especially if you're in a cold climate (glycol prevents freezing, which can crack the pipes and break the chiller). Don't just use tap water - minerals in tap water will build up in the chiller over time and reduce efficiency. Once you fill it, turn on the water pump first, make sure there's no air in the lines (air will make the pump make weird noises and damage it), then turn on the chiller. Start with the lowest setting, let it run for 10 minutes, check for leaks, check the pressure, check the temperature. If everything looks good, crank it up to the desired setting, and let it run for an hour. If you notice anything off - like the temperature not dropping, or weird noises - turn it off and check. Don't keep running a broken chiller, that'll make it worse.
Last, do a final check. Make sure all pipes are secure, all electrical connections are tight, the chiller is level, and the ventilation is good. Once it's running consistently for 24 hours, you're done! But here's a pro tip: take photos of every step of the install, and keep the manual for your chiller somewhere safe. If something goes wrong down the line, you'll have the documentation and the steps you did, which will make troubleshooting way easier. Also, sign up for our maintenance reminder - we'll send you an email every 6 months to remind you to check the filters, clean the condenser, and do a quick leak check. That'll keep your chiller running for 10+ years, which is way better than having to replace it early.
Before I wrap this up, a quick note: if at any point you're not sure what to do, don't guess. Reach out to our team - we're chiller suppliers, so we know these units inside and out, and we can answer your questions, point you to the right parts, or even connect you with a local tech if you need a little help. Our goal isn't just to sell you a chiller - it's to make sure it works for you, whether you install it yourself or not.
If you're ready to pick out a chiller, our stock is always updated, and all the units I mentioned earlier - the KUENLING, Hongli, Carrier, Haier, and YORK ones - are all in stock and ready to ship. Head to our site to check them out, or send us a message to talk through your specific space and cooling needs. We're here to help you get the right chiller for the job, without all the stress.
References
- ASHRAE Handbook: HVAC Systems and Equipment (Chiller Installation Guidelines)
- Chiller Manufacturer's Association: DIY Chiller Install Safety and Best Practices
- Local Building Code Requirements for Industrial Equipment Installation (U.S. Standard)
- Our Company's Chiller Pre-shipment Inspection Protocols for Used Units